Epsom salt luminaries. I recently saw a post on epsom salt crystal mason jars for tealight candles. It seemed to simple to be as pretty as it was. So I decided that it would be a fun thing for the 3 year old and I to try today. There weren't many ingredients and the few that it did involve were non toxic, non staining, and not hard to clean up afterwards. Not to mention it is a great education project in crystal making that can be used at any age. Motivate those minds mom.. This is a start for a great lesson plan in geodes and crystals, and its fun.
I was VERY pleased with our results. and there was NO GLUE involved which is wonderful and makes me feel better about it all, because I know that salt is one option for putting out fires, so with water and salt being the main ingredients in this crystal making tealight candle holder craft project I feel a little more safe about it all..
It took some trial and error, some recipe tweaking, but we made the prettiest tea light candle holders ever. You can click any picture to make it larger and see the finer details that the small images do not show. he crystals are amazing.
This would be a great project for garden parties, weddings, cook outs, holiday decor, everyday use, and its so fun and easy you could even throw it together the day of your event. (time permitting)
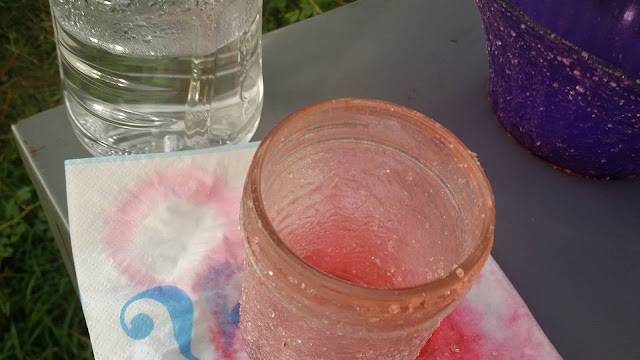
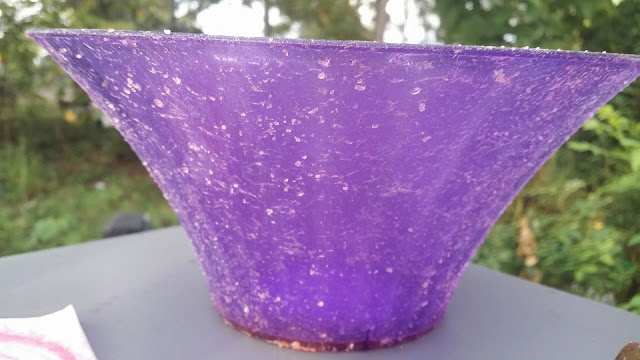
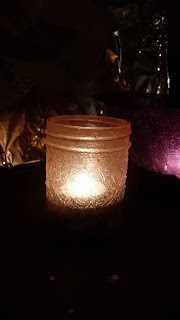
Just look at them sparkling and shining, aren't they gorgeous. I used real tea light candles, and that is probably safe enough in the mason jar tealight holder, but the second one made from a plastic bowl I got at dollar tree and If you make that one I would recommend getting battery powered tealight candles. This is frosted so no one will be any wiser that its not an actual flame, and it will still look so pretty.
The original DIY for this project said to do the outside, but I wasn't pleased with the results so I ended up doing the inside and outside of the mason jar, and the purple bowl. I was much more pleased with the results that way.
The epsom salt crystals have a frosty color and for immediately when dry. So this is a fairly quick craft project, and as I mentioned, kid friendly too. The inside epsom salt was painted on with a paintbrush but the outside was dabbed on with a sponge paintbrush.
The original recipe (is a mixture for a craft project called a recipe? Im a foodie anything you mix together is a recipe.. am I right?) said to completely dissolve the epsom salt in warm water and I did that with the first coat, but decided I liked it better with a few undissolved epsom salt rocks in there while they were sitting outside to dry it was so pretty watching the sun reflect off the epsom salt rocks, it looked like glitter. Just like it does in the next picture. Isn't that pretty?
I planned trying to put a sealer on them, but decided against it because
1. these were so simple to make that if they start to show wear it really isn't that much effort to redo. just rinse and start over and depending on how many coats of the epsom salt solution you decide to put to get your desired effect you could have them totally redone and drying in 30 minutes.
2. I'm not sure how safe a sealer would be so near a fire. It might be fine to use a sealer if you intend to use these candle luminaries with battery operated candles, but so many sealers say "highly flammable" right on the container so I wouldn't chance it.
We tinted our epsom salt mixture with food coloring, but you could probably also tint it with rit dye, or another type of dye but make sure to read the package and ensure it is not flammable before you do. Safety first..
I know I'm not your mother but I am a mother, and I feel like I need to stress to you DO NOT USE any flammable materials. God forbid you catch yourself on fire and I carry that guilt forever. No thanks.
So now for the how to make epsom salt luminarie candle dishes or jars for tea light candles part of this post..
1/4 cup epsom salt
1/4 cup warm water
6 drops desired colored food coloring (optional)(more or less to reach the color you want)
6 or 8 drops dishwashing liquid
paint brush, or sponge, cotton balls, or rag
Mix all ingredients stirring gently so not to create bubbles to dissolve epsom salt (I left some undissolved)
Apply mixture to dish (i recommend doing inside and outside of dish)
let dry completely between coats before applying the next coat. I did 2 on the inside and 5 or 6 on the outside. I recommend dabbing as opposed to wiping as it is less likely to cause the previous layer to wipe off.. apply as many coats and you would like until the glass is as frosted as you want it to be.
and that's all there is too it.
Never leave candles unattended...


No comments:
Post a Comment